Login
Log in if you have an account
Register
By creating an account with our store, you will be able to move through the checkout process faster, store multiple addresses, view and track your orders in your account, and more.
Create an accountTraveling with Your Bike: A Practical Guide to Flying Stress-Free
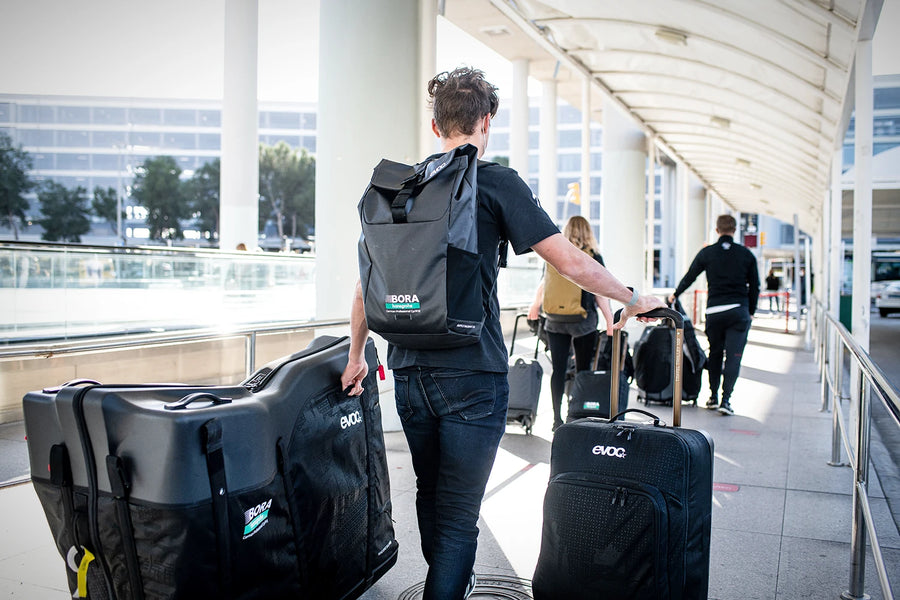
Traveling with your bike is often the beginning of an incredible adventure: an Ironman, a training camp, a mountain getaway, or simply the pleasure of discovering new roads.
But between choosing a bike travel case, disassembling your bike, and navigating airline regulations, many cyclists wonder:
“Will my bike arrive safely?”
The good news is that with a little preparation, traveling with your bike can be much easier than expected.
Here are our best tips to help you travel with confidence and peace of mind.
Choosing the Right Bike Travel Case
Choosing the right travel case is one of the first important decisions when flying with your bike.
There are three main options: a hard case, a soft bike bag, or a cardboard bike box. Each option has its own advantages depending on your budget, how often you travel, and your destination.
Hard Case
A hard case provides the highest level of protection against impacts and the sometimes rough handling that luggage can experience during air travel.
Advantages
- Maximum protection for your bike.
- Ideal for frequent travelers.
- Provides great peace of mind.
Disadvantages
- Heavier and bulkier.
- More expensive to purchase.
Soft Bike Bag
High-quality soft bike bags have become increasingly popular. Thanks to reinforced panels and thoughtful designs, they offer excellent protection while being easier to transport and store.
Advantages
- Lighter than hard cases.
- Easier to store when not in use.
- Protective enough for most trips when the bike is properly packed.
Disadvantages
- Provide slightly less protection than a hard case in the event of a major impact.
The Cardboard Bike Box
Often overlooked, a cardboard bike box remains an excellent option, especially for one-way trips or when you plan to leave the airport by bike.
Advantages
- Often available for free from your local bike shop.
- Extremely lightweight.
- Easy to recycle once you arrive at your destination.
- Great if you plan to ride away from the airport.
Disadvantages
- Offers less protection than a dedicated bike case.
- You will need to plan where to find another box for your return trip. Before leaving, locate a bike shop near your destination to make sure you can get a replacement box.
Before Choosing Your Transportation Solution
No matter which option you choose, take the time to check the following:
- The maximum dimensions and weight accepted by your airline.
- The total weight of your bike once packed.
- Compatibility between your bike and the travel case, especially if your bike has disc brakes, an integrated cockpit, or deep-section wheels.
Proper preparation will help you avoid surprises at the airport and ensure your bike arrives safely at your destination.
Learn How to Pack Your Bike
The best advice we can give you: do not wait until the night before your departure.
Do a practice disassembly a few weeks before your trip. You will learn:
- Which tools you will need.
- How long it takes to pack your bike.
- Which steps require the most attention.
After one or two practice runs, most cyclists can pack their bike in 30 to 45 minutes without stress.
Take Photos of Everything
Before removing a single bolt, take out your phone.
Take photos of:
- Your complete bike from both sides.
- Your cockpit setup.
- Your saddle height.
- The position of the spacers under your stem.
- Cable or brake hose routing.
- The inside of your travel case once your bike is fully packed.
These photos will be extremely valuable to:
- Reassemble your bike quickly.
- Restore your exact setup.
- Document the bike’s condition in case you need to file a claim with the airline.
Remove the Most Vulnerable Components
You generally do not need to completely disassemble your bike. Focus on removing the components most exposed to impacts:
- Pedals.
- Wheels.
- Rear derailleur (without disconnecting the cable or removing the battery on electronic groupsets).
- Bottle cages, if necessary.
- Accessories such as your GPS, lights, pump, or bags.
Then protect your frame with foam, tube protectors, or even sections of pipe insulation.
A few extra minutes of preparation can prevent scratches… or much worse.
What About Tubeless Tires?
This is probably one of the most common questions we get.
Do I need to remove the sealant?
No.
You can travel with your tubeless setup and leave the sealant inside your tires.
Do I need to completely deflate my tires?
Not necessarily.
We recommend slightly lowering the tire pressure (around 15 to 20 psi) to prevent the tires from being completely rigid during transport.
While packing, take the opportunity to include a few essential items in your travel case:
- A spare inner tube.
- Tire levers.
- A few tubeless plugs (especially for mountain bikes and gravel bikes).
- A valve core remover.
- One or two spare valve cores.
- A small bottle of sealant if you plan to top up your tires once you arrive.
This kit also applies to cyclists using inner tubes. Simply remove the tubeless-specific items: tubeless plugs, valve core remover, valve cores, and sealant.
Are CO₂ Cartridges Allowed on Planes?
In most cases, CO₂ cartridges are not allowed, either in checked luggage or carry-on bags.
Rules can vary depending on the airline and country, so always verify before traveling.
Here are a few alternatives:
Bring a Mini Pump
This is the simplest and most universal option.
Use a Small Rechargeable Electric Pump
Compact and extremely practical for traveling, a small electric pump allows you to quickly inflate your tires once you arrive.
And there is a good chance you will become the hero of your group ride when someone needs a quick inflation boost!
Buy CO₂ Cartridges at Your Destination
If you prefer using CO₂, the easiest solution is usually to purchase cartridges once you arrive.
Before your departure, always take a few minutes to check your airline’s “Dangerous Goods” section to confirm the current regulations.
Bring Your Bike Fit Sheet
If you have previously completed a professional bike fit, print or save your fit sheet before your trip.
It should include:
- Saddle height.
- Saddle setback.
- Stem length and angle.
- Handlebar width.
- Cockpit height.
- Cleat position.
If you have any doubts while reassembling your bike, you will be able to quickly restore your exact riding position.
Pack a Small Bag of Essential Spare Parts
Here are the items we always recommend bringing with you:
The Traveling Cyclist’s Survival Kit
- Compatible rear derailleur hanger.
- 1 inner tube.
- 1 quick link.
- 2 or 3 tubeless valve cores.
- A pair of brake pads.
- A small multi-tool.
- A rechargeable electric pump.
These parts take very little space but can save you valuable time and frustration once you arrive at your destination.
Reserve Your Bike’s Spot on the Plane
Many airlines limit the number of bicycles accepted on each flight.
Never assume there will be room for your bike.
When booking your flight:
- Add your bike as sports equipment baggage.
- Confirm applicable fees.
- Verify the weight limit (often 23 kg or 32 kg).
- Arrive early at the airport for oversized baggage drop-off.
Some airlines also require a phone reservation for bicycles.
Make sure to complete this step when purchasing your ticket to avoid surprises at the airport.
Our Pre-Departure Checklist
Here is the checklist we often use at the workshop before a bike leaves for a trip:
☐ Bike inspected and ready to ride
☐ Travel case checked and properly labeled
☐ Photos taken before disassembly
☐ Pedals and rear derailleur removed
☐ Tire pressure reduced
☐ Bike fit sheet printed or saved
☐ Spare parts packed
☐ Bike reservation confirmed with the airline
Final Thoughts
Traveling with your bike requires a little organization, but it is not something reserved only for professional mechanics.
With:
- A good travel case.
- A few practice packing sessions.
- Reference photos.
- A small essential repair kit.
You can significantly reduce the risk of damage and minimize stress once you arrive.
Most importantly, you can focus on what really matters:
Enjoying your vacation and riding new roads.
Need Help Preparing Your Bike for Travel?
Visit us at Cycles Dupuis. Our team can help you:
- Inspect your bike before departure.
- Show you how to properly pack it.
- Provide the necessary protection materials.
- Help you choose the right travel case for your type of trip.
Safe travels, and enjoy the ride!
Recent articles
View all
Argon 18 Nitrogen Pro: The Return of an Icon, Completely Reinvented

Bike Theft: Why Should You Register Your Bike with Project 529?